User Guide
1. Overview
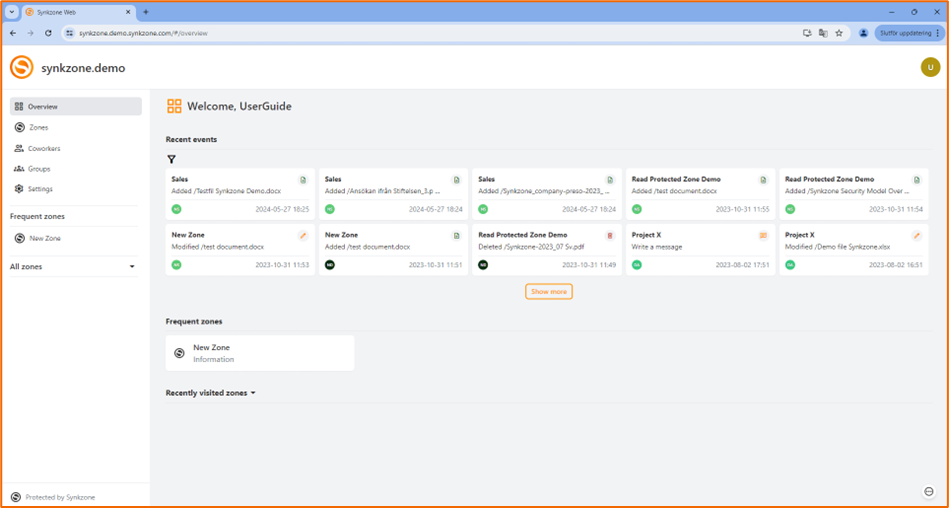
This is the start view and here you will find your zones, your co-workers, groups and the most recent events in the zones you are a member of.
2. User management
To be able to create new Users you need to have the role of Administrator or Group administrator.
To create a new User click “Create New User” in the upper right corner.
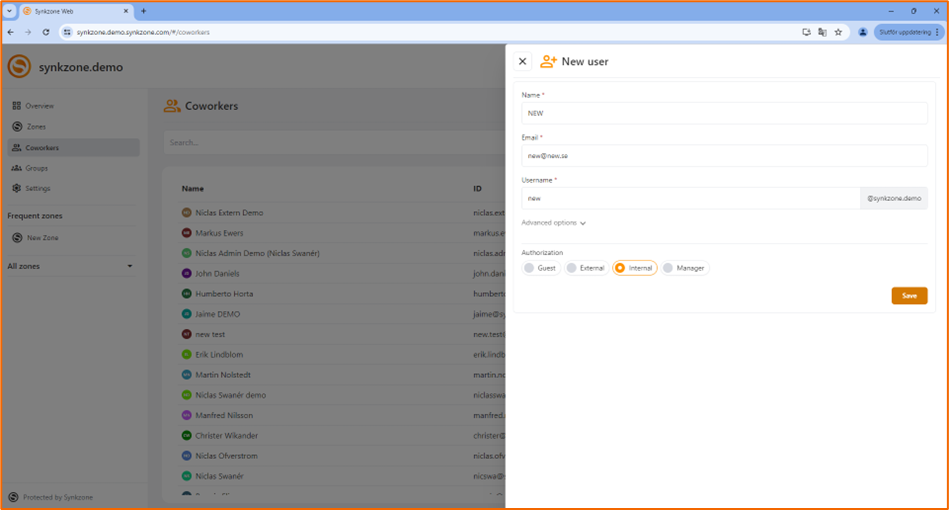
Fill out the requested information about the user; Name, email-address, and username is mandatory. Synkzone will suggest a unique username, but this can also be changed if you would like to.
Note! The username suggested is based on the name of the user and will contain e.g. å, ä, ö and other letters if in the name of the user, you could consider changing this before saving the new user.
Then select the appropriate Authorization Level. In Synkzone the following authorization levels are available:
Administrator: The highest level used daily. Typically, a manager for an organizational unit or a system administrator. This role can create any other user and or zones.
Group administrator: Typically, a head of an organizational unit, business or a project leader. A Group administrator can create zones and users such as Internal, External and Guest.
Internal: Typically, an employee of the organization. An Internal user can’t create zones but can be a Zone Manager and by this add existing users to a zone.
External: A user outside your organization. Can be a member in any zone but can’t be appointed Zone Manager.
Guest: An external user with the limitation of only being able to be member of one zone at a time. Typically used for a project or delivery to a customer.
An External User and a Guest can also be market “Hidden.” A “Hidden” user is not visible (shown in Co-workers) to anyone other than the “Manager” and “Administrator.” Of course, a hidden user is visible to all members within a zone.
Below you will find a complete table with all the user levels and their limitations.
| Level | Main administrator | Administrator | Group administrator | Internal | External | Guest |
|---|---|---|---|---|---|---|
| Can see coworkers (i.e. members in all zones of which itself is a member) | Yes | Yes | Yes | Yes | Yes | Yes |
| Can be hidden | No | No | No | No | Yes | Yes |
| Can be a member of more than one zone | Yes | Yes | Yes | Yes | Yes | No |
| Can be made zone manager | Yes | Yes | Yes | Yes* | No | No |
| Can see all non-hidden users | Yes | Yes | Yes | No* | No | No |
| Can see all user accounts created by itself | Yes | Yes | Yes | No | No | No |
| Can create any type of zone | Yes | Yes | Yes | No | No | No |
| Can create personal zones | Yes | Yes | Yes | Yes* | No | No |
| Can create and manage any other user of lower authorization levels than itself | Yes | Yes | Yes | No | No | No |
| Can assign new credentials for any user of lower authorization levels | Yes | Yes | No | No | No | No |
| Can assign new credentials for users of lower authorization levels that have a full overlap in zone membership | Yes | Yes | Yes | No | No | No |
| Can see all users (incl. hidden) | Yes | Yes | No* | No | No | No |
| Can assign new credentials for any user | Yes | Yes | No | No | No | No |
| Can change organization settings | Yes | No | No | No | No | No |
*It is possible to change the rules through organization policies, but these are the standard default settings.
Existing users
In Coworkers you will see all the users that you have an interaction with. (e.g. members in a zone where you also participate). This is if you are a user. If you are an Administrator or Group administrator, you will see all users in the organization that are not hidden.
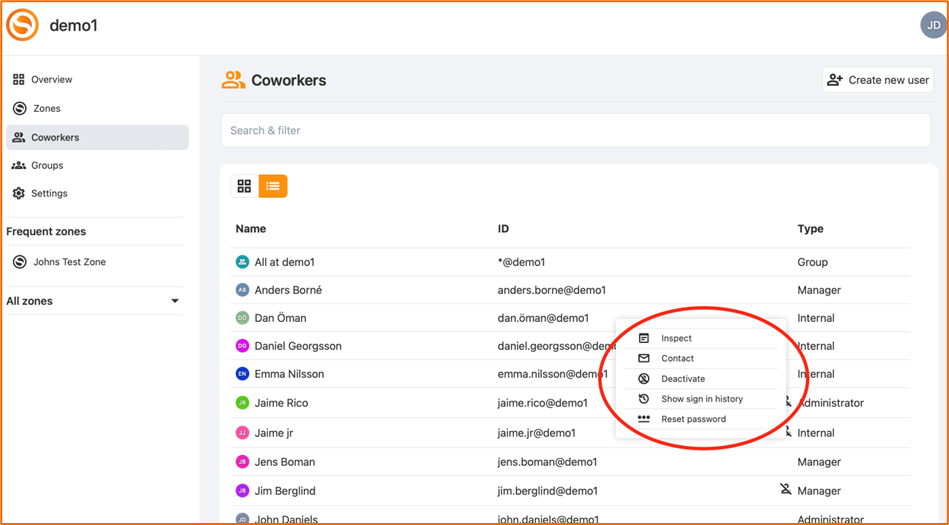
Right click on a user in ”Coworkers” to show more information about the user. If you are an Administrator or Group administrator, you are also able to deactivate a user.
The list of users is also searchable.
Reset password for a user
The Coworkers view is also where Administrators and Group administrators can reset the password for a user. Administrators can reset passwords for Users and Group administrators. Group administrators can reset passwords for Users that have full zone overlap with the Group administrator.
Make a user inactive / remove a user permanently
If a user no longer should have access to the organization in Synkzone an Administrator or Group administrator have two ways of disabling access: deactivate or remove permanently. A deactivated user can be reactivated.
When a user is deactivated, it is prohibited from logging on to the organization until it becomes activated.
To remove a user permanently you need at first to set the user as inactive and then remove the user permanently.
You can reset passwords, deactivate, reactivate and permanently delete users with a lower authorization level
To deactivate, reactivate or permanently delete a user go the Coworker view. Select a user and press the three dots to the right or right click to activate the administration panel for an individual user.
3. Groups
A group is a collection of users in an organization. Groups can be added as members of a zone, granting them access rights like those of individual users. Groups provide an efficient way to organize users within an organization.
Groups are created and managed from the group’s view by Administrators and Group administrators.
Create a group
Administrator and Group administrators can create groups.
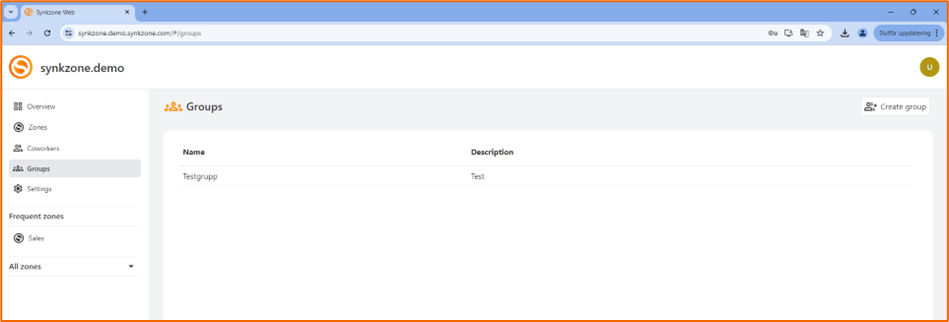
To create a group, press “Create group”. Give the group a name and a description.
A group consists of one or more managers and as many members as desired. If needed, a group can also be a member of another group. After creating the group, only the group manager(s) can manage the group members.
It is recommended to create a group for all users at the organization, like “All at XXXX Cyber Security”, to be able to easily add all users to zones that contains information common to everyone in the organization.
Manage groups
To view the members and details of a group, navigate to the group view then right click on the group and choose “Inspect”.

All users in the organization except external users and guests will see all groups in the organization, external users and guests will only see the groups where they are members.
To edit the members of a group or change the name or description, right click on the group and choose “Inspect”. Make the desired changes and press “Save”. Only the Group Manager can make changes to the group.
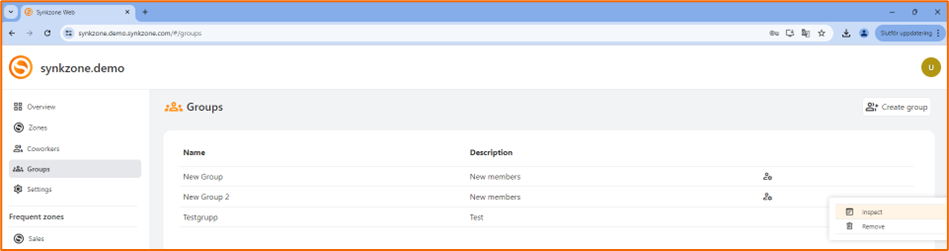
To delete a group, as a Group Manager: right click on the group and choose “Remove” and confirm the removal in the popup. The group will be deleted directly.
Groups as zone members
When giving a group access rights to a zone, making it a zone member, all members of the group will get access to the zone and its content just as if they were added individually. A group can have any access level in a zone except being a zone manager.
If access rights to a zone are provided by multiple group memberships, the highest access level will be used. If an explicit access level is set for a user in a zone, that explicit level will take precedence over all other access levels provided by the group.
E.g. if a user is individually added to the zone with “Add” rights and the group is added with “Modify” rights, then the resulting access right for that user will be “Add'”. If the group is removed as a zone member, the user will still have the individual access right to the zone.
4. Zones and zone settings
Create a zone
A zone is a secure space for collaboration where you can both store and share files securely, internally within the organization and externally in a project with partners or customers.
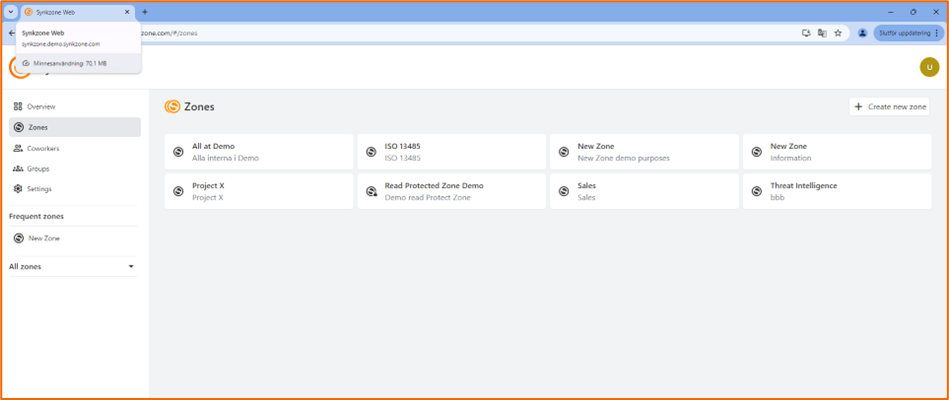
Create a zone by navigating to “Zones” in the left panel. Click “Create new zone”.
When you create a zone, you will automatically become “Zone Manger”.
Give the zone a name and a description.
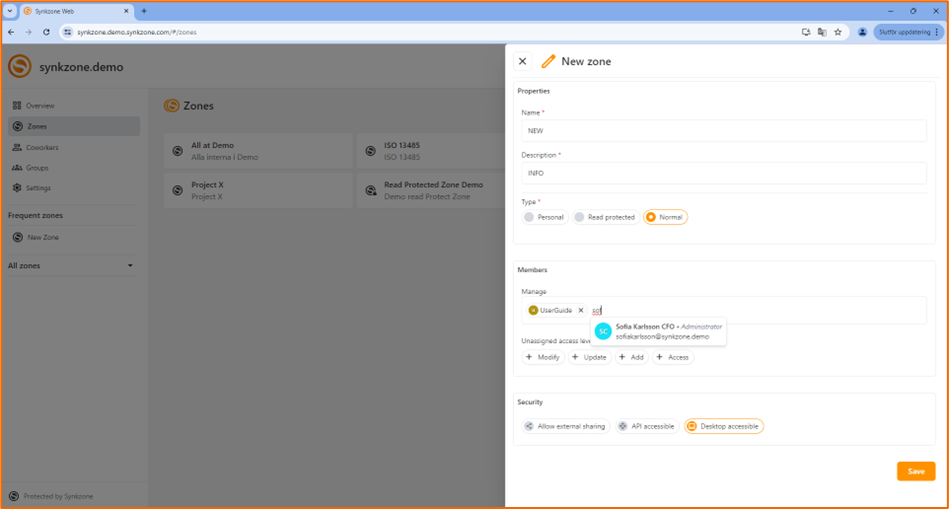
Choose how the zone should be accessible and if you will allow sharing of external links. - Allow external sharing – Enables the possibility to share links to documents with non-members of the zone. - Synkzone API Accessible – This should only be checked if your organization also uses Synkzone API. - Synkzone Desktop Accessible/Synkzone Web Accessible – You can choose if the Zone also should be accessible from the Desktop or Web.
Finally select the zone type. - Normal – In a normal zone all material is accessible for all the members in the zone. When using the Desktop client information will also be synchronized and downloaded to your local client. Read more about this in section 8.5. - Personal – This is only available in organizations that allows this. A personal zone is only available for the specific user. - Read protected – In a read protected zone all members will see the content available. To access any content, you need to identify yourself by password, OTP or MFA. In the Desktop client the content will be synchronized but not downloaded to your local storage.
If you’re creating a shared zone (a zone of type normal or read protected) you’ll be able to add members when creating the zone. It’s also possible to add and manage the zone members after creating the zone.
If needed, the creator of a zone doesn’t have to be a member of the zone. In that case just appoint the Zone Manager(s) and remove your own account from “manager”.
For details about zone membership, see separate section “Members in zones” below.
Press “Save” to create the zone. The new zone will now be visible under ”Zones” and in the list ”All zones” in the left panel.
As Zone Manager you can always change the settings under ”Zone settings”.
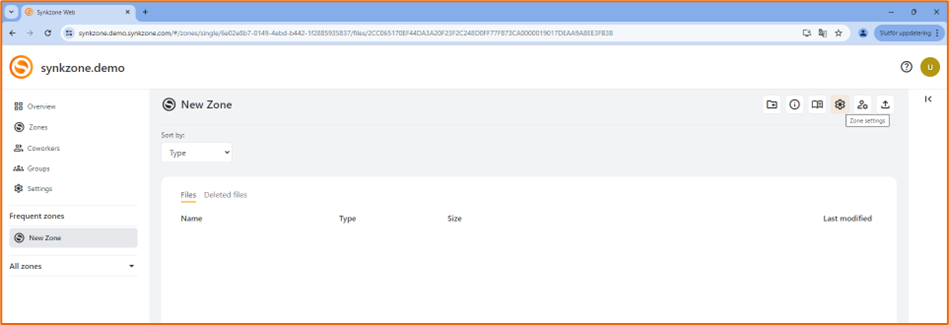
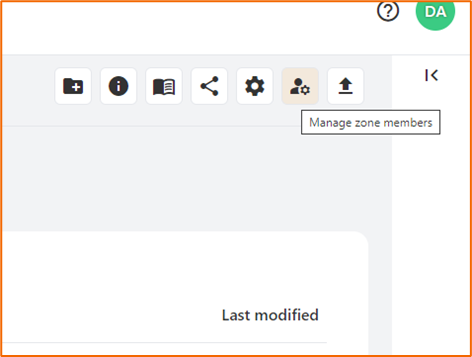
Members in zones
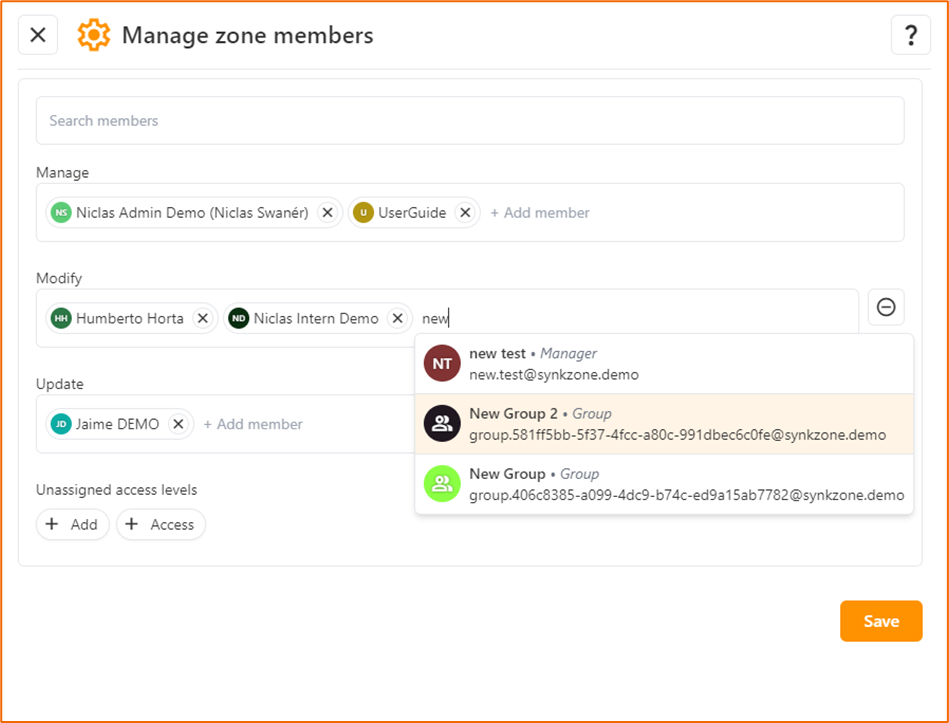
Navigate to the icon “Manage zone members”. Here you will be able to administrate members and access levels in a zone.
To add users or groups as members in a zone you need to be Zone Manager.
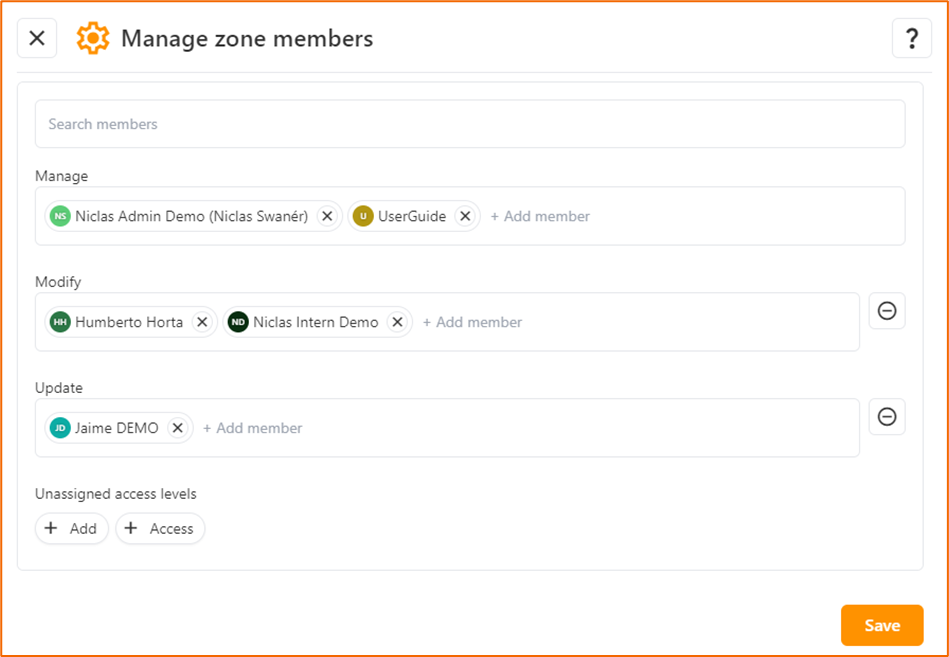
Choose the desired access levels and add the users for each access level by writing the name of the user or group that should be added. If you want to see a list of all available users and members to add, press down arrow. When there’s an access level not assigned to any members, they’re visible under “Unassigned access levels”, just click on them to be able to add a member to the zone with that access level. When all members are added, press “Save”.
At the question mark in the top right corner, you will find a description of the different access levels. There must be at least one Zone Manager in a zone. The Zone Manager can hand over the Zone Manager role to another individual and then leave the zone. We recommend having at least two Zone Managers in each zone.
To change the access level of an existing Zone Member, drag and drop the user to the new correct access level row. Remember to press “Save” to save the changes to the zone members.
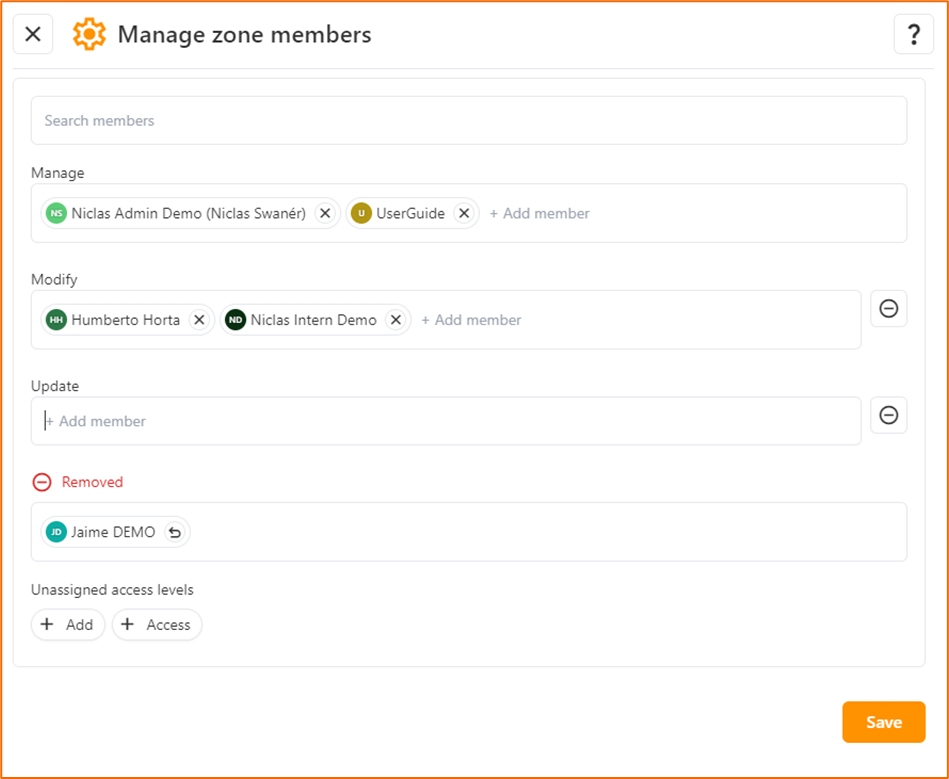
Removing a zone member
To remove a Zone Member, open the Manage zone members and press the ‘x’ next to the member or drag and drop it outside of the access level rows. The removed member(s) will appear in a “removed” row. From there it’s possible to undo the removal of a member, i.e. bringing it back to the previous access level. Save the changes. By this the members will no longer have access to the Zone.
Note! When working in a “Normal zone” (i.e. not Read Protected) within the synchronizing client Synkzone Desktop, the user will still have access to files already synchronized and downloaded locally.
Delete a zone
To delete a zone, you must be a Zone Manager. Before you delete a zone, you must revoke all members from the zone. When you are the last person in the zone you click “Leave Zone” from the tab “Information” in the right panel. By leaving the zone the zone will disappear, and no one will be able to access it again.
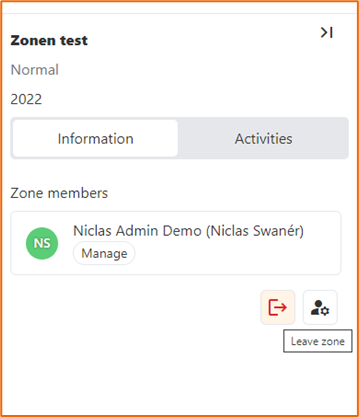
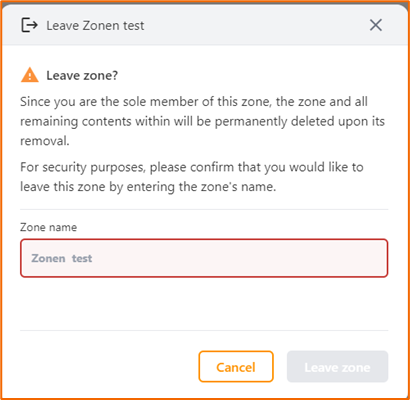
When leaving a zone all content will be permanently deleted. As a security measure you will be asked to verify this by entering the name of the zone.
File locks
To avoid conflicts, it’s recommended to use file locks. By using file locks, you can avoid creating unnecessary conflicts when many users are expected to work, contribute to the same file. If a conflict is created the system will warn you and create a specific conflict version to avoid wiring over information. An information file is created where you can identify with whom and when the conflict occurred, that file is called “~Conflicts.txt”.
Synkzone has three different file locks. Right click a file, choose “More information” and you will have the following options: - Read protect: A file that is read protected requires that you enter either your password or your OTP (depending on log on policies). The file is visible on your client but stored encrypted on and the server. To access a read protected file you need to be online. The file will open in the host application but never automatically be downloaded to your local disc. - Write protect: Prevents a file from being modified. No one can modify a write protected file and upload it with the same name. Used when you would like to avoid changes to a certain file. - Lock file: Protects the file from being changed by anyone else than the one that locked the file. Used when you would like to make sure that a file can’t be changed by anyone else.
Note! A Zone Manager can override any file lock.
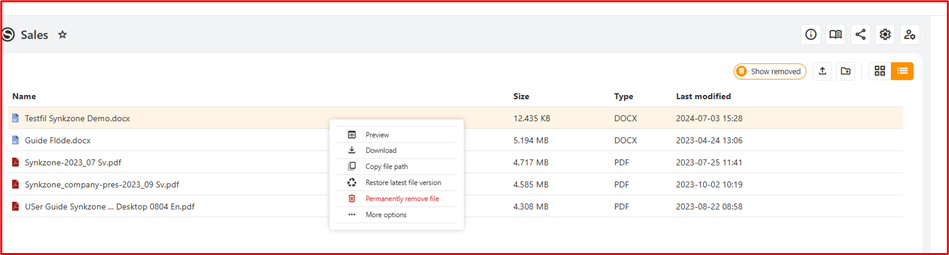
Deleted files
In all zones there is one button for deleted files. Click this and you can view any file that has been removed. From here, files can be either restored or permanently removed.
To remove a file from the zone, right click the selected file and chose “Remove”. The file will now be moved to the tab “Deleted files”.
As a built-in protection from deleting files by mistake only Zone Managers can permanently remove files from Zone.
To restore a file simply right click the file and chose “Restore”.
5. Migrate data
Migrate to Synkzone
Migrating data to Synkzone is easy and can be done using both the web and desktop client, even though we recommend using the desktop client.
Before you get started, decide on a strategy on how to structure your data and which zones you should create to fulfil that strategy. - Create the zones (managers and members can be added during creation or later) - For each zone: - Navigate to the mapped folder on your local disk - Add the content to that folder - Wait for the zone to be fully synchronized - Your data is now stored in Synkzone
If you’re migrating a lot of data, and having many zones, the complete synchronization of all zones can take a while. It’s possible to go offline during the synchronization, which will then make a pause and continue again when you’re back online.
Separate files can maximum have the size of 12 GB and a single folder can contain a maximum of 4000 files.
Migrate from Synkzone
If you want to move your information from Synkzone to another service, use the Synkzone Desktop client and follow these steps for each zone in the organization:
- Go to zone settings
- Choose synchronization mode “All” and adjust “Allocated disk space” to cover the total size of all the content of the zone
- Wait until the zone is fully synchronized
- All files are now available in clear text to copy on your local disk and move to desired location